本指南将详细介绍在 CentOS 8 / RHEL 8 Linux 服务器上安装 Ghost CMS 的步骤。Ghost 是一个开源内容管理系统,专为初学者和专业博主和文档团队设计。Ghost CMS 完全支持 Markdown ,并为管理和内容生成提供易于使用的 Web 界面。
在本文中,我们将使用 Nginx 作为反向代理在 CentOS 8 上安装 Ghost。我在全新安装的 CentOS 8 上进行此设置。建议这样做以确保您不会破坏您的生产环境。
在 CentOS / RHEL 8 上安装 Ghost
以下是在 RHEL / CentOS 8 上安装 Ghost 通常要遵循的步骤。在 CentOS 8 / RHEL 8 上安装 Ghost 时喝杯咖啡。
第一步:更新 CentOS 系统
我们总是从 yum 包更新开始我们的安装。
sudo dnf -y update
sudo reboot
重新启动后,将您的 SELinux 设置为许可模式。
sudo setenforce 0
sudo sed -i 's/^SELINUX=.*/SELINUX=permissive/g' /etc/selinux/config
第 2 步:添加 EPEL 存储库
一些依赖包将从 EPEL 存储库中提取。通过下面的命令执行将其添加到您的系统中。
sudo dnf -y install https://dl.fedoraproject.org/pub/epel/epel-release-latest-8.noarch.rpm
第三步:安装 MySQL / MariaDB 数据库服务器
为 Ghost CMS 安装数据库服务器。这可以是 MySQL 或 MariaDB 数据库服务器。我们有设置 MySQL 或 MariaDB 数据库服务器的指南。
完成后,为您计划添加的 Ghost 博客创建数据库:
$ mysql -u root -p
CREATE USER ghost@localhost IDENTIFIED BY "StrongPassword";
CREATE DATABASE  ghost;
GRANT ALL ON ghost.* TO ghost@localhost;
FLUSH PRIVILEGES;
QUIT
第 4 步:安装 Node.js 和 PM2
Ghost 的核心是用 Node.js 编写的。npm 包管理器将作为依赖项安装。
sudo dnf remove -y @nodejs
curl --silent --location https://rpm.nodesource.com/setup_16.x | sudo bash -
sudo dnf install -y nodejs
确认节点版本
$ node -v
v16.15.0
Ghost 进程可以通过 pm2 进程管理器进行控制。让我们确保 pm2 已安装在系统中。
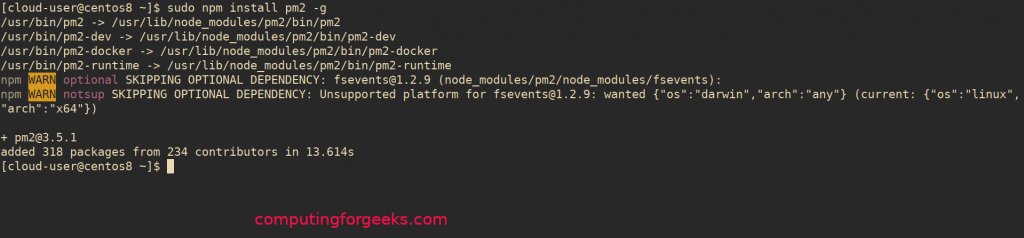
sudo npm install pm2 -g
安装成功输出;
第 5 步:安装 Ghost-CLI
创建 Ghost 管理员用户:
sudo useradd ghostadmin
sudo passwd ghostadmin
sudo usermod -aG wheel ghostadmin
我们现在需要安装提供 ghost 命令的包 ghost-cli。
$ sudo npm i -g ghost-cli
/usr/bin/ghost -> /usr/lib/node_modules/ghost-cli/bin/ghost
+ ghost-cli@1.21.0
added 478 packages from 270 contributors in 24.515s

$ which ghost
/usr/local/bin/ghost
第 6 步:在 CentOS / RHEL 8 上配置 Ghost
为 Ghost Data 创建一个新文件夹:
请注意:
- 在/root文件夹中安装 Ghost 将不起作用,并导致设置损坏!
- 在您的/home/{user}文件夹中安装 Ghost 将不起作用,并导致设置损坏!
- 请仅使用 /var/www/{folder} 因为它具有正确的权限。
所以让我们创建这个目录:
sudo mkdir -p /var/www/ghost
sudo chown ghostadmin:ghostadmin /var/www/ghost
sudo chmod 775 /var/www/ghost
创建您的 Ghost 项目(博客)文件夹:
sudo su - ghostadmin
cd /var/www/ghost
mkdir blog.example.com
cd blog.example.com
在哪里:
- blog.example.com是包含站点/博客文件的目录。
- /var/www/ghost是您的博客目录的路径
如果要使用数据库安装 Ghost,请运行:
## Ghost with Sqlite db ###
ghost install --db=sqlite3

## Ghost with MySQL db ###
ghost install --db=mysql
对于开发环境,您可以执行以下操作:
ghost install local
提供服务 URL、数据库连接详细信息,并同意配置 Systemd。
✔ Finishing install process
? Enter your blog URL: http://localhost:2368
? Enter your MySQL hostname: localhost
? Enter your MySQL username: ghost
? Enter your MySQL password: [hidden]
? Enter your Ghost database name: ghost
? Do you wish to set up Systemd? Yes
完成安装,然后通过运行确认服务状态:
$ ghost ls
$ systemctl status ghost_blog-computingforgeeks-com
● ghost_blog-computingforgeeks-com.service - Ghost systemd service for blog: blog-computingforgeeks-com
   Loaded: loaded (/var/www/ghost/blog.computingforgeeks.com/system/files/ghost_blog-computingforgeeks-com.service; indirect; vendor preset: disab>
   Active: active (running) since Sat 2019-10-05 19:05:48 EAT; 10min ago
     Docs: https://docs.ghost.org
 Main PID: 12669 (ghost run)
    Tasks: 18 (limit: 11512)
   Memory: 142.9M
   CGroup: /system.slice/ghost_blog-computingforgeeks-com.service
           ├─12669 ghost run
           └─12678 /usr/bin/node current/index.js
...............................................................
例子:

第 7 步:为 Ghost CMS 配置 Nginx 代理
安装 Nginx
sudo dnf install @nginx
为 Ghost 创建 Nginx 配置文件。
sudo vi /etc/nginx/conf.d/ghost.conf
添加您的网站配置。
server {
    listen 80;
    listen [::]:80;

    server_name blog.example.com;
    root /var/www/ghost/blog.example.com/system/nginx-root;

    location / {
        proxy_set_header X-Forwarded-For $proxy_add_x_forwarded_for;
        proxy_set_header X-Forwarded-Proto $scheme;
        proxy_set_header X-Real-IP $remote_addr;
        proxy_set_header Host $http_host;
        proxy_pass http://127.0.0.1:2368;

    }

    location ~ /.well-known {
        allow all;
    }

    client_max_body_size 50m;
}
代替:
- blog.example.com与您的 Ghost 站点 URL
- /var/www/ghost/blog.example.com带有指向您站点 DocumentRoot 的路径
- http://127.0.0.1:2368与本地 Ghost 监听 URL
您的 Nginx 配置不应包含任何错误。
$ sudo nginx -t
nginx: the configuration file /etc/nginx/nginx.conf syntax is ok
nginx: configuration file /etc/nginx/nginx.conf test is successful
确认节点服务后端处于活动状态。
$ sudo netstat -tunlp | grep 2368
tcp        0      0 127.0.0.1:2368          0.0.0.0:*               LISTEN      12678/node
确认后重启nginx服务。
sudo systemctl enable --now nginx
sudo systemctl restart nginx
作为执行命令的结果,预期会成功重新启动。
$ systemctl status nginx
● nginx.service - The nginx HTTP and reverse proxy server
   Loaded: loaded (/usr/lib/systemd/system/nginx.service; enabled; vendor preset: disabled)
   Active: active (running) since Sun 2019-10-06 12:05:47 EAT; 29s ago
  Process: 21817 ExecStart=/usr/sbin/nginx (code=exited, status=0/SUCCESS)
  Process: 21814 ExecStartPre=/usr/sbin/nginx -t (code=exited, status=0/SUCCESS)
  Process: 21812 ExecStartPre=/usr/bin/rm -f /run/nginx.pid (code=exited, status=0/SUCCESS)
 Main PID: 21819 (nginx)
    Tasks: 2 (limit: 11512)
   Memory: 3.9M
   CGroup: /system.slice/nginx.service
           ├─21819 nginx: master process /usr/sbin/nginx
           └─21820 nginx: worker process

Oct 06 12:05:47 centos8.novalocal systemd[1]: Stopped The nginx HTTP and reverse proxy server.
Oct 06 12:05:47 centos8.novalocal systemd[1]: Starting The nginx HTTP and reverse proxy server...
Oct 06 12:05:47 centos8.novalocal nginx[21814]: nginx: the configuration file /etc/nginx/nginx.conf syntax is ok
Oct 06 12:05:47 centos8.novalocal nginx[21814]: nginx: configuration file /etc/nginx/nginx.conf test is successful
Oct 06 12:05:47 centos8.novalocal systemd[1]: Started The nginx HTTP and reverse proxy server.
在防火墙中打开 http 和 https 服务端口。
sudo firewall-cmd --add-service={http,https} --permanent
sudo firewall-cmd --reload
第 8 步:在 CentOS 8 / RHEL 8 上访问 Ghost CMS 仪表板
现在您的设置已准备就绪,访问 Ghost Web 管理界面,您可以在其中上传主题、更改设置并使用 Markdown 语法编写内容。
要完成出版物的设置,请访问:
单击“创建您的帐户”创建您的第一个 Ghost 管理员/发布者帐户。

可选择邀请其他成员。您将在几秒钟内到达 Ghost CMS 仪表板。

第 9 步:Ghost 基本管理命令
以下是大多数 Ghost 管理操作所需的命令。
日志目录: /content/logs/
$ ghost start : 启动 ghost
$ ghost restart : 重新启动 ghost
$ ghost run : 测试 ghost 是否能成功启动
$ ghost uninstall : 重新安装 ghost
$ ghost update : 升级 ghost
$ ghost update –force : 如果出现错误则强制升级
$ ghost update –rollback : 如果升级失败则恢复到早期版本
$ sudo npm i -g ghost-cli@latest : 升级 Ghost-CLI
$ ghost ssl-renew : 更新 ssl 证书
$ ls 。 /system/files/*.conf : 系统配置文件
$ ghost setup nginx : 手动设置 nginx
$ ghost setup nginx ssl : 使用 SSL 设置 nginx